A Fancy and Practical Zsh Configuration
“Design is not just what it looks like and feels like.
Design is how it works.”
— Steve Jobs
Prologue
Hey there! Well, as a loyal Windows user, it is a bit weired to mention Zsh. We have PowerShell, and we can have Bash with WSL. But Zsh? Why there is Zsh?
Well, I have to confess, I bought a MacBook, and for MacOS, the default shell is Zsh. To be honest, I hate MacOS as I can’t get used to its user interface. To make myself more confortable, I have to do extensive customization, but still it is no comparable to Windows. And as a developer, you just pay more attention to what you are more familiar with — the shell. With Mac’s key bindings, the experience is terrible, a nightmare, especially for a formal, and current, Windows player.
This is not a serious article, just for sharing my configuration of Zsh. I’ll talk about how to configure Zsh, including plugins, themes and key bindings. In addition, I’ll also share a pretty cool configuration for your terminal.
Hope you like it, enjoy!
Maybe I should mention that this post is intended for Mac users? Although you can have Zsh on other systems as well.
Shell Configuration
So, let’s talk about shell first. Before we start, I assume that you have basic knowledge about Bash.
Zsh is the default shell doesn’t mean you don’t have Bash. You still have it on your system.
The Missing Homebrew
I don’t know why Homebrew is not bundled. But you can simply install it via one command.
1 | /bin/bash -c "$(curl -fsSL https://raw.githubusercontent.com/Homebrew/install/HEAD/install.sh)" |
Oh My Zsh
Zsh is famous for its customizability. But customization leads to more complexity. Therefore, Oh My Zsh is here to help you manage the complexity. That is to say, it is a configuration manager for Zsh.
To install On My Zsh, just run one line of command. In Zsh, we have an equivalence for .bashrc — .zshrc. It will prompt to backup or update your .zshrc. If you have other configurations before, remember to transfer them.
1 | sh -c "$(curl -fsSL https://install.ohmyz.sh/)" |
You can check the new .zshrc. It’s long, but you only need to pay attention to several keys. You may also add user configurations at the bottom of the file.
1 | ZSH_THEME=... |
Themes
Well, the first thing to configure is without doubt, the theme. For me, I choose agnoster, one of the most fancy ones. To use a theme, just set the ZSH_THEME variable in .zshrc. For agnoster, if you don’t like the default context color (for username@host), you can also set it manually.
1 | AGNOSTER_CONTEXT_FG=yellow |
Note that the repository agnoster/agnoster-zsh-theme is not the bundled one, and I think is not maintained anymore. You should check the bundled agnoster.zsh-theme in the Oh My Zsh repository.
In order to be fancy, some themes will use Powerline Font or a Nerd Font for special characters, so you should either install them, or enable the corresponding options in your terminal. Later I will mention how to enable Powerline Font in iTerm2.
Well, I failed to setup Powerline Font in the default Mac terminal.
Plugins
Following theme, some plugins can boost your productivity, and also make your terminal prettier. Here’s a list of plugins that I prefer. Too many plugins may not be a good option.
1 | plugins=( |
zsh-syntax-highlighting: providing syntax highlighting for your commands
1 | git clone https://github.com/zsh-users/zsh-syntax-highlighting.git ${ZSH_CUSTOM:-~/.oh-my-zsh/custom}/plugins/zsh-syntax-highlighting |
zsh-autosuggestions: enable inline history completion like PowerShell
1 | git clone https://github.com/zsh-users/zsh-autosuggestions ${ZSH_CUSTOM:-~/.oh-my-zsh/custom}/plugins/zsh-autosuggestions |
zsh-shift-select: allow you select text in commands like in Windows
1 | git clone https://github.com/jirutka/zsh-shift-select.git ${ZSH_CUSTOM:-~/.oh-my-zsh/custom}/plugins/zsh-shift-select |
Finally, git is a built-in plugin. It displays git status in the prompt.
Key Bindings
Now your Zsh is pretty, but is hard to use. You find yourself unable to move the cursor by word, and unable to delete characters by word, which is annoying.
Fun Commands
The configuration should end here. But due to my strong personal affection, I have to introduce my favorite commandline combo to you.
1 | brew install cowsay fortune |
Then, you can add these aliases to your .zshrc.
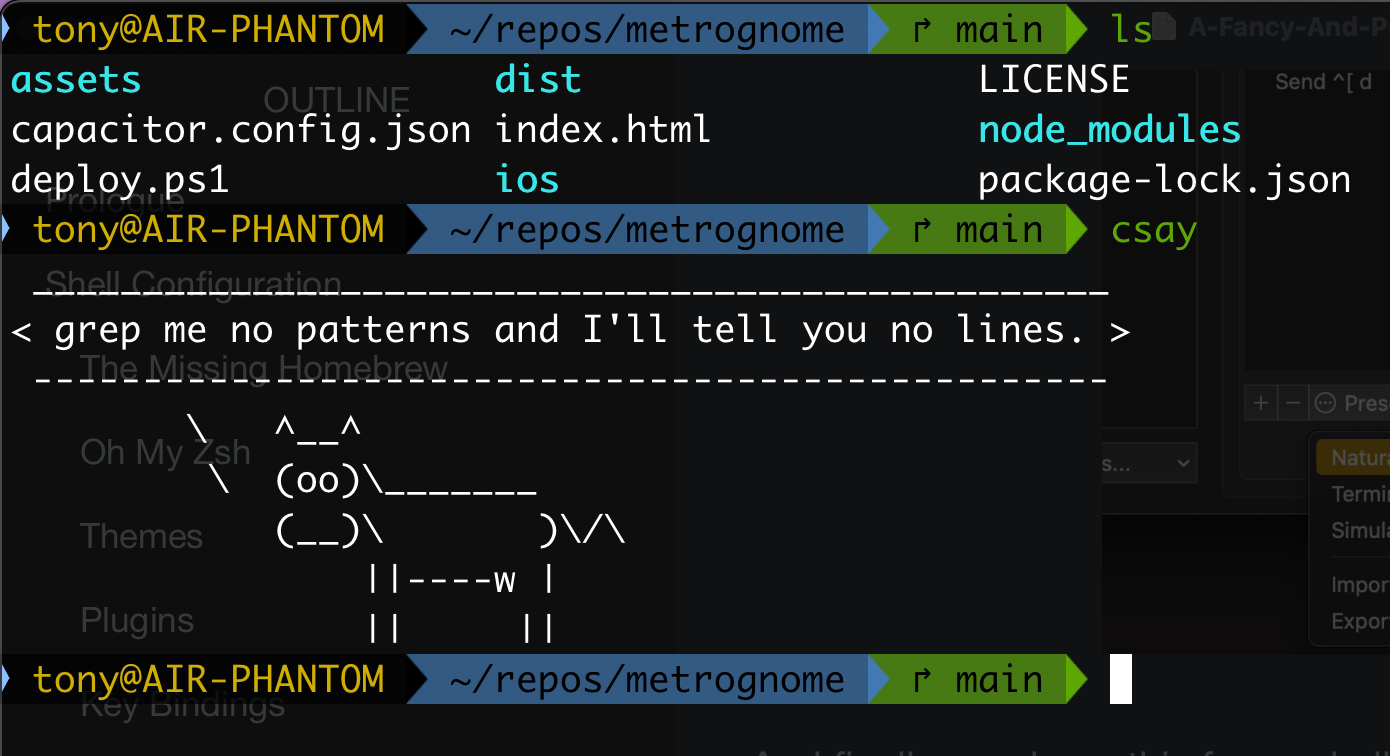
1 | alias csay="fortune | cowsay -n" |
Now, you can have this lovely cow in your shell!
1 | > csay |
Terminal Configuration
Well, your shell is pretty now, but still you feel something is missing. Well, you cannot start it via a shortcut! And the default terminal is a little shabby.
Here, as many others do, I recommend you iTerm2. It is fancier, and have a workaround for the shortcut issue.
Hotkey Window
In iTerm2, you can define hotkey window, which is activated by a custom hotkey. You can find it in Settings > Profiles.

But it does not completely solve the problem, as it requires iTerm2 to be in the background, i.e. unable to remove it from the Dock.
Profile
You can continue customize your terminal under Settings > Profiles. For me, I prefer “Tango Dark” theme.
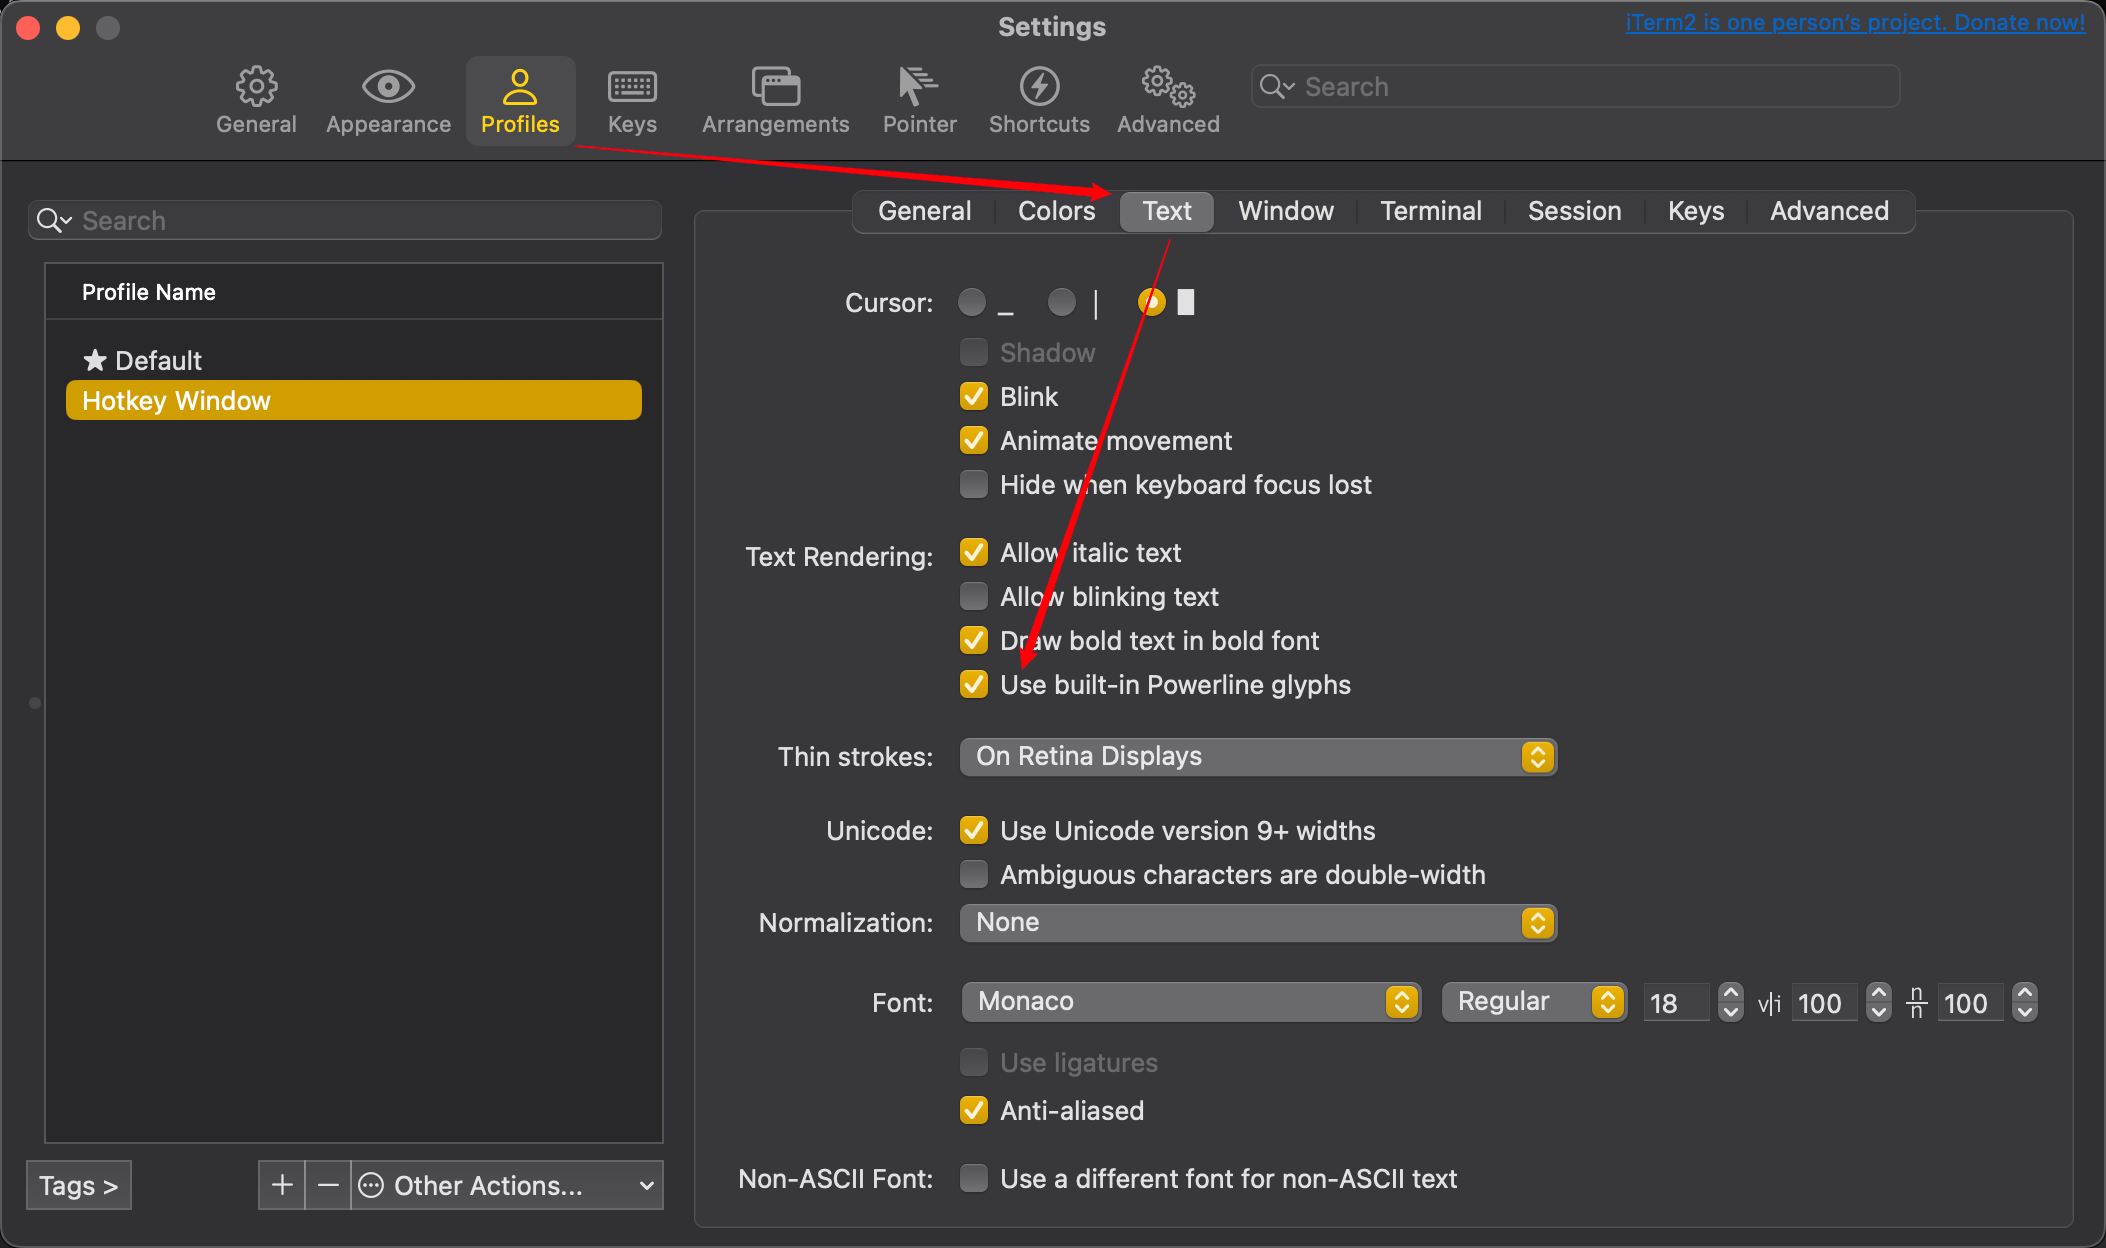
If you selected a fancy Oh My Zsh theme which requires Powerline Font or Nerd Fonts, the simplest way is to check the “Use built-in” Powerline glyphs.
Key Bindings Again
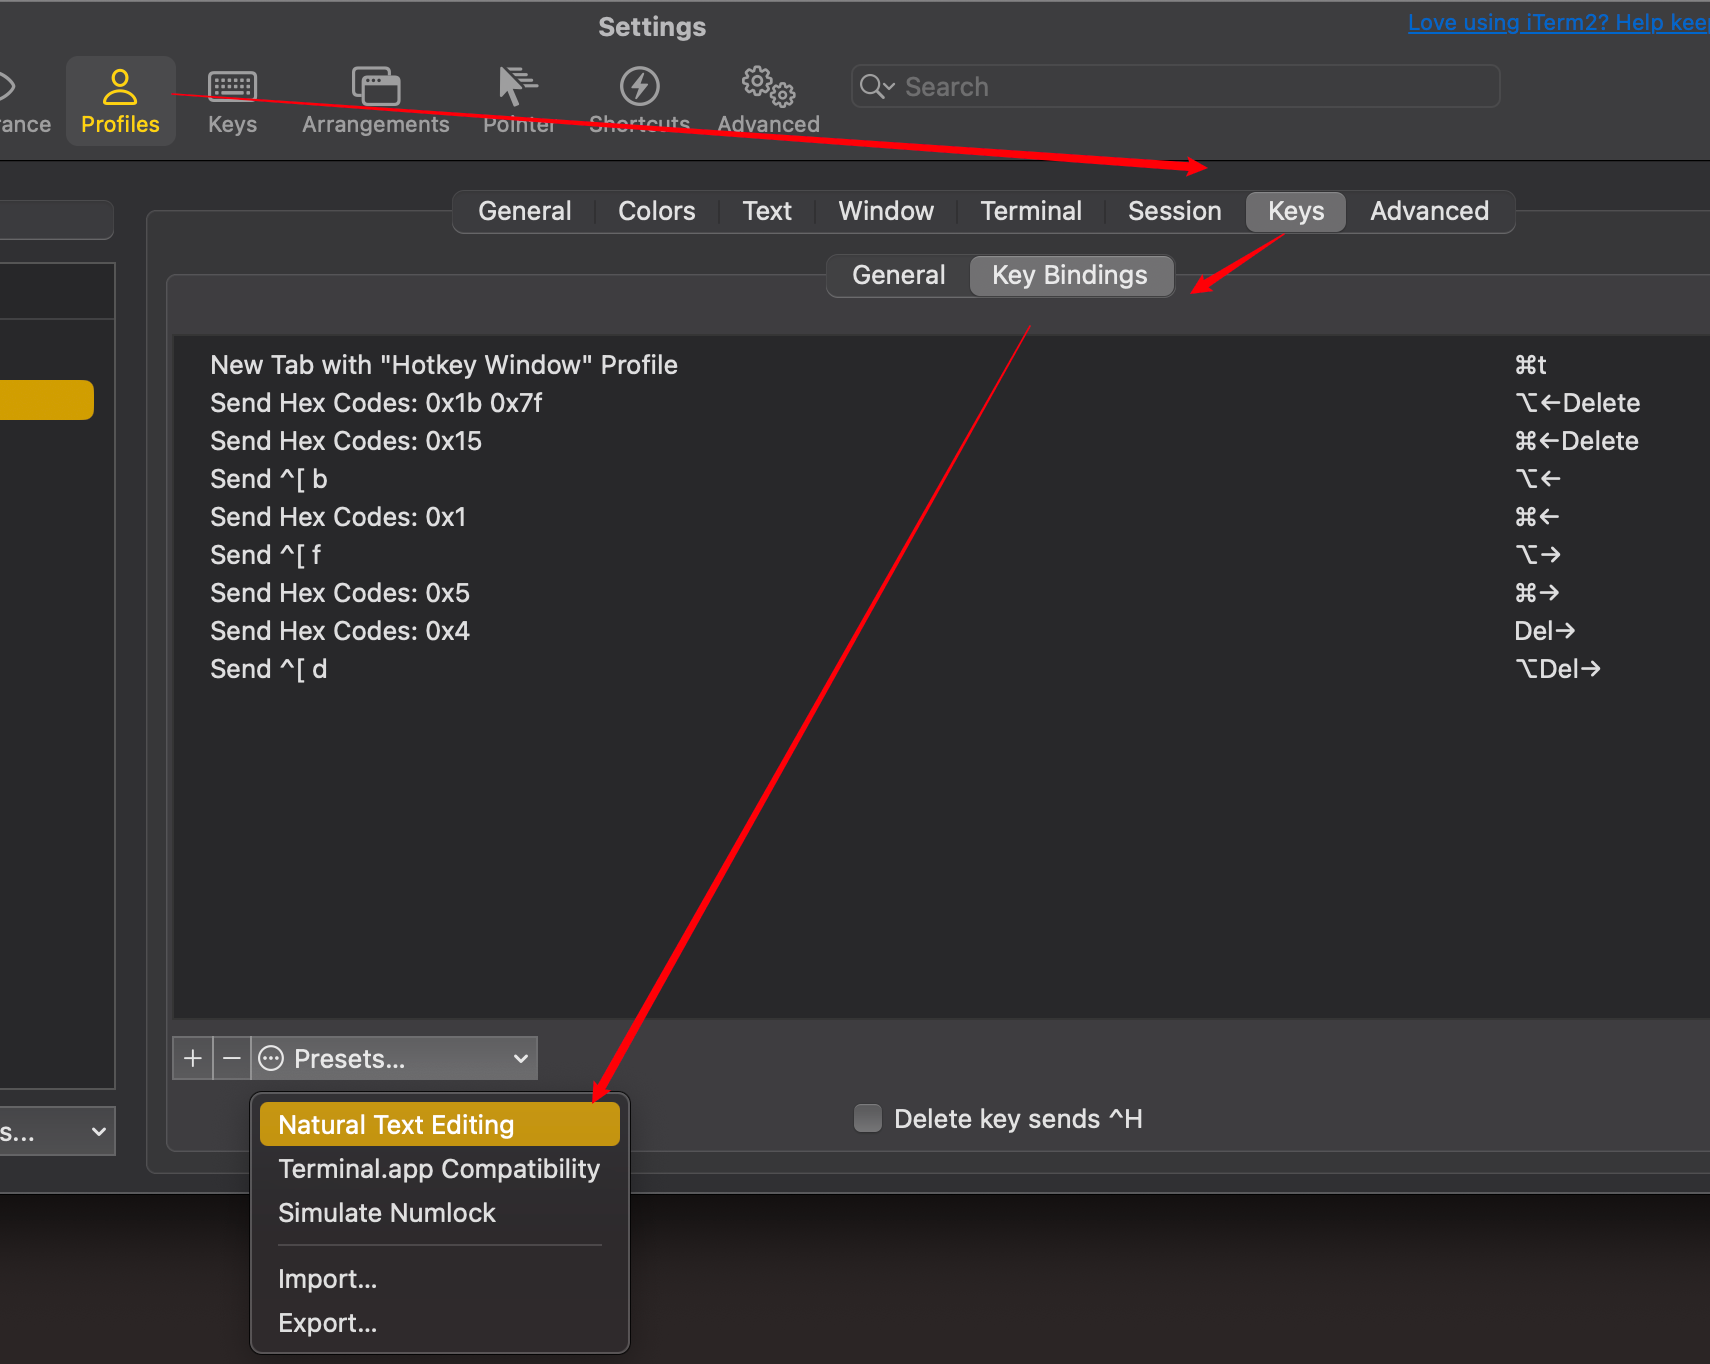
In iTerm2, you don’t need to add key bindings in your .zshrc. Instead, it can be solved rather easily by adding the “Natural Text Editing” preset in Settings > Profiles > Keys > Key Bindings.
Epilogue
Now, you have this fancy shell interface.🎉
However, no matter how nice it looks, it is incomparable to Windows. ᓚᘏᗢ