Getting Started With Coq
“For all these years, I've faced the world alone.
And now the time has come,
To prove to them I've made it on my own!”
— This Is The Moment (Jekyll & Hyde)
Prologue
Why Coq? It seems to be a topic off track based on what this blog has right now. Well, This post actually kicks off a new category, where I will put stuffs I find interesting during my academic career. Coq is the first topic I came across, and also the first formal method that I put a hand on.
Setting up Coq
What is Coq?
Coq, pronounced as /kɒk/, is a tool for you to write formal proofs that can be automatically verified. It use formal language and tactics to prove something so that the proof is considered true once it is done with Coq. One feature is that you can write proofs with Coq interactively, which is more convenient and reliable than doing it on paper.
Fun fact, as Coq is originally designed by French, its symbol is a rooster — French national symbol. Also, the pronunciation is the same as cock, another name for rooster.
What is Rocq
“The Rocq Prover implements a high-level program specification and mathematical language called Gallina that is based on an expressive formal language called the Polymorphic, Cumulative Calculus of Inductive Constructions that itself combines both a higher-order logic and a richly-typed functional programming language. ”
It is formally know as Coq Proof Assistant. So, in a word, it proves us a platform to write proofs.
Installing Rocq Prover
Installing Rocq is quite easy, as it provides installer on all platforms, see Install the Rocq Prover.
The default installation location is directly under C:\, change it based on your preference. Although known as Rocq Platform now, the installation folder is still identified as Coq Platform.
After installation, you will have CoqIDE available. I will talk about how to write proof later.
Installing VSCode Extension for Rocq
Similar to the fate of IDLE (Python IDE), CoqIDE is eclipsed by Visual Studio Code. So we can setup our workspace with VSCode instead.
To do this, we need to install the VSCode extension VsCoq.

Then, we need to setup the language server for Coq.
Starting from version 2025.01, which is the latest version at the time of writing this post, the Rocq Platform already includes the language server for VSCode, so you don’t need to install another one unless you want the alternative Coq LSP.
Open the settings tab for VsCoq and fill in the path to vscoqtop. It is located under the installation path of Rocq Platform.
1 | C:\Path\to\Coq-Platform\bin\vscoqtop.exe |
There is both coqtop.exe and vscoqtop.exe under bin\, and only vscoqtop.exe works in VSCode. Also, you may need to restart VSCode to apply the change.
After setting up language server, you can write proofs in VSCode.😆
Writing Proofs
Now that we have the environment, how to actually write proofs? Unfortunately, I’m not good at mathematics and proofing, so I can only give a preliminary view of this.
Here are some useful links for you to explore.
- Rocq Reference Manual
- Theorem proving with Coq
- Programs and Proofs — Mechanizing Mathematics with Dependent Types
Proof in Action
Still, I think some explanation is needed.
The 1 + 1 Problem
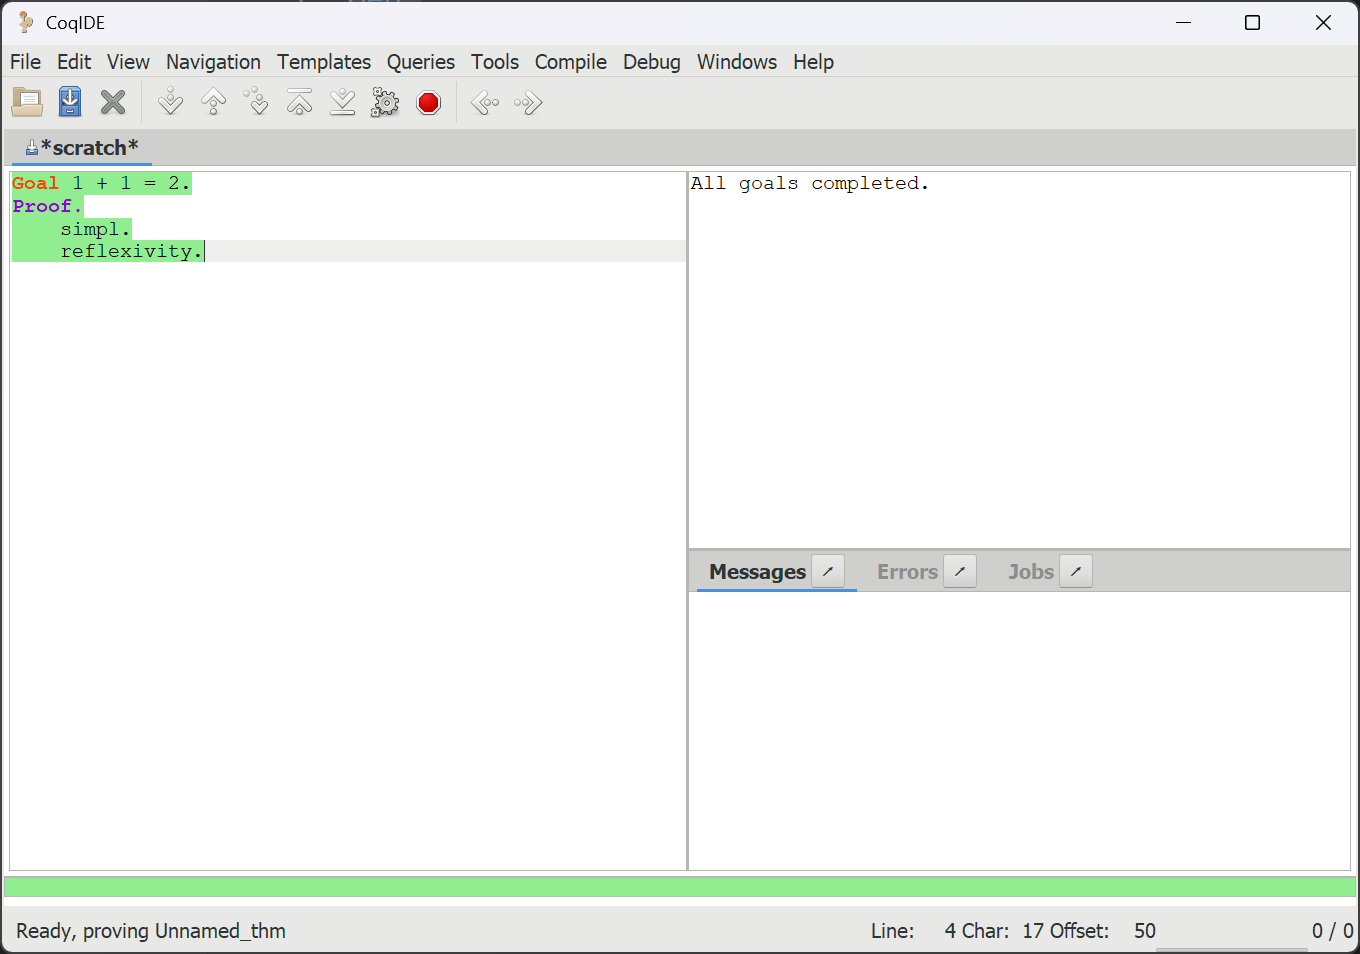
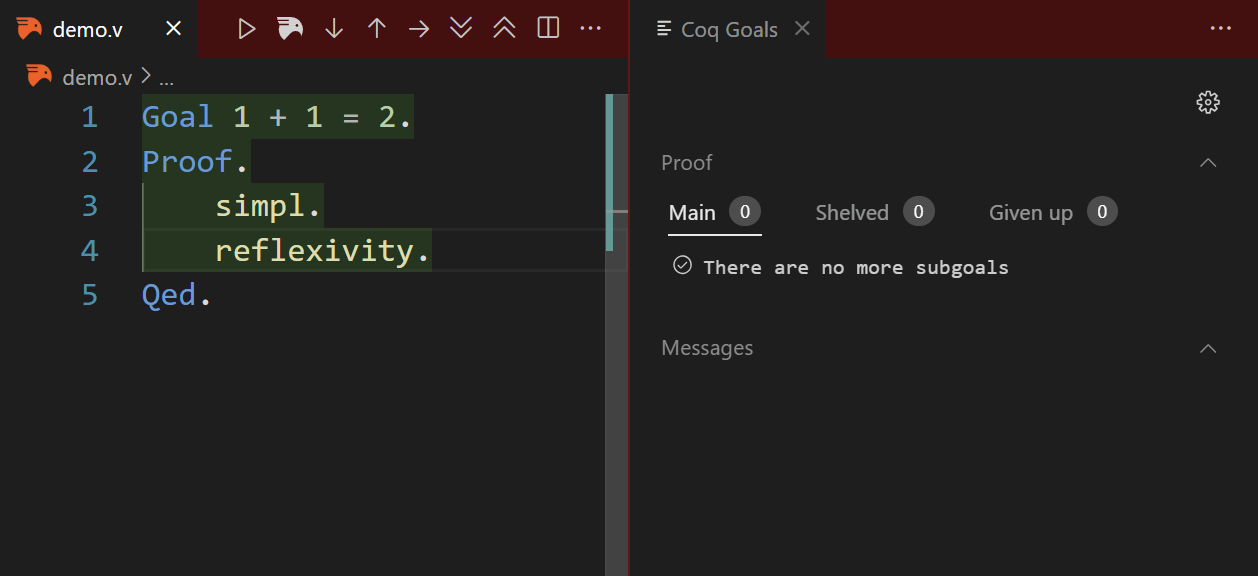
First, let’s have a look on the proof shown before, the 1 + 1 problem.
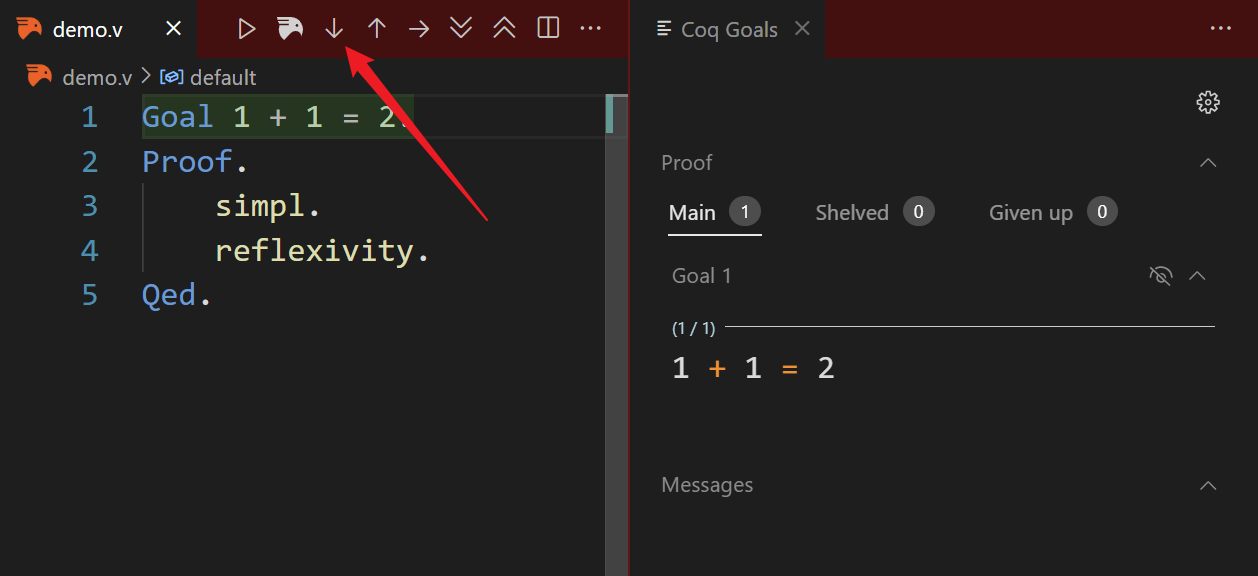
To write proofs, we need to enter proof mode. This can be done with Goal or theorem tokens like Theorem or Lemma (see Entering and exiting proof mode). The difference is that Goal is anonymous and theorems need names. Click “Step Forward”, and you can see the current state of the proof.
Do note that, like natural language, we add period . at the end of each statement.
Then, we can start proofing with Proof. First, we use simpl to simplify the current goal with basic tactics. Here, it calculate the result of 1 + 1.
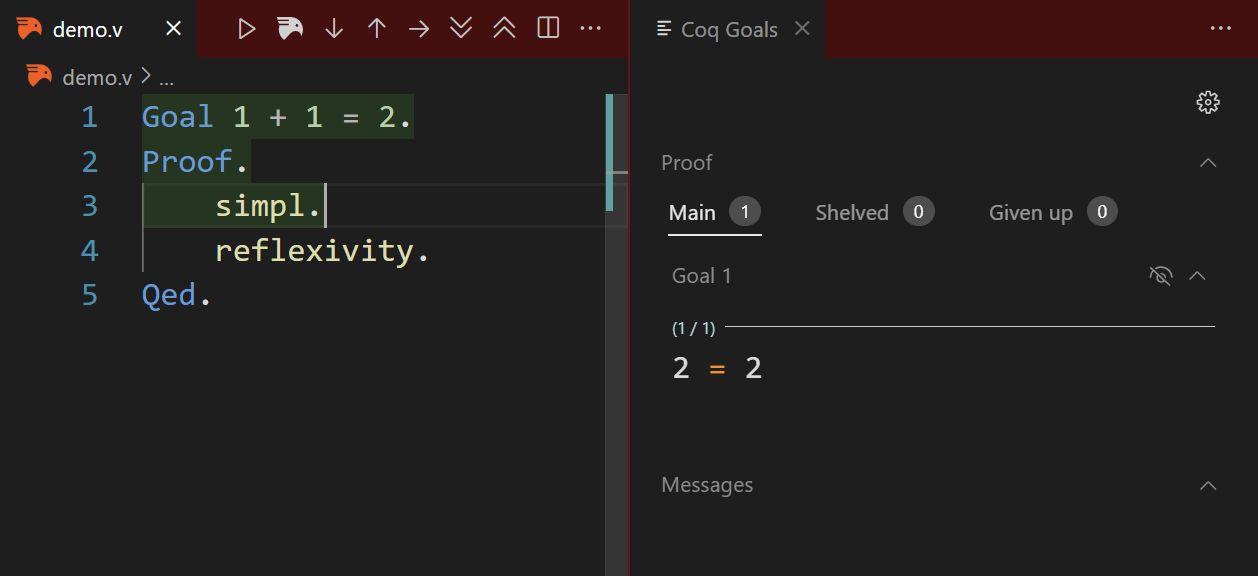
In Coq, the steps we use to write proof is called tactics, e.g. simpl and reflexivity.
The goal is quite straightforward now, as 2 is equal to 2 without a doubt, so we can use reflexivity to prove it. After this, all goals are proved.
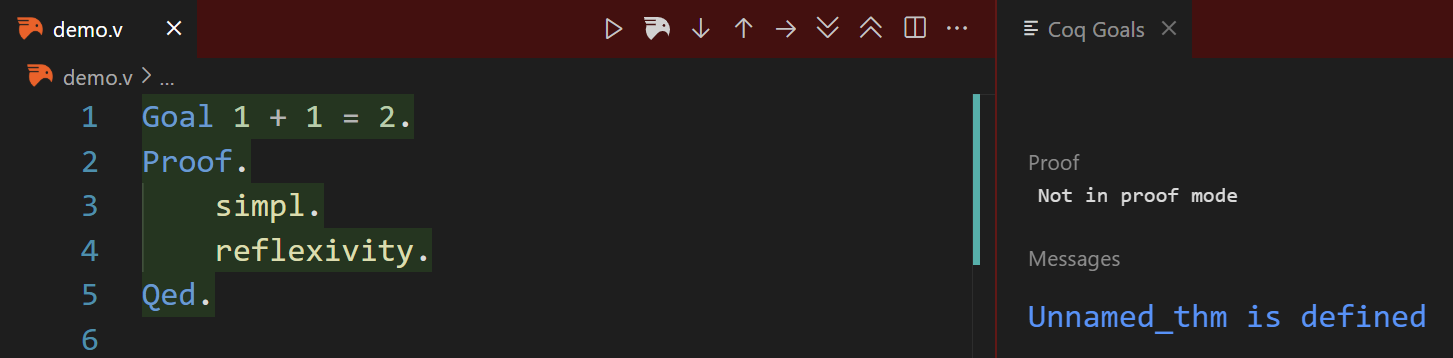
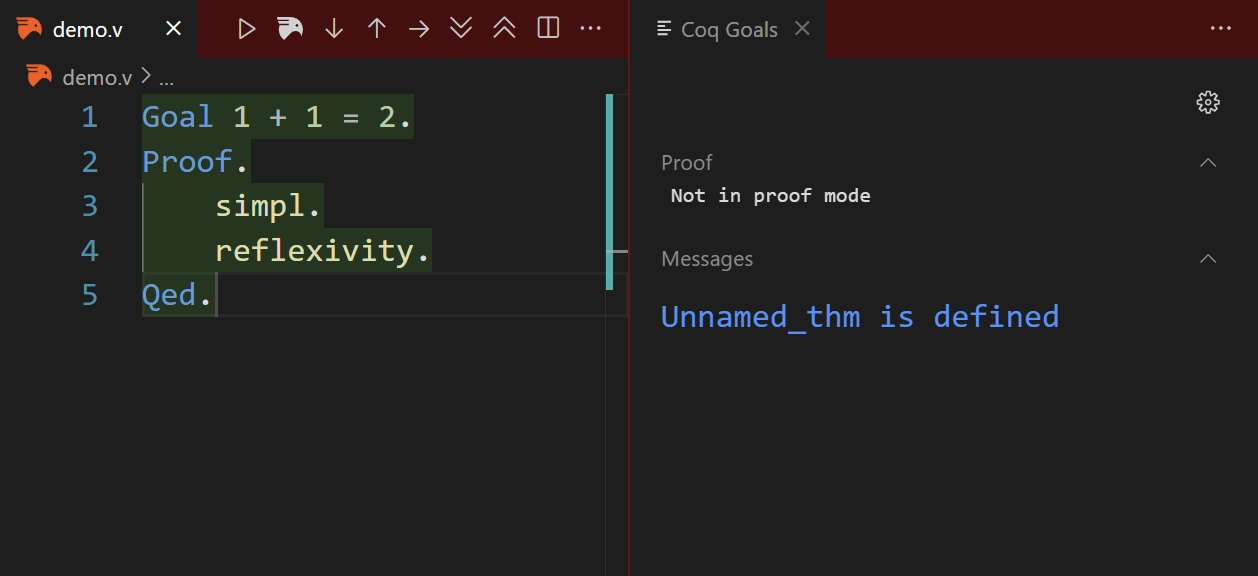
Then, we can end this proof by Qed. The message means that our “theorem” is proved and defined for other theorems to use.
Hilbert’s S Axiom
Then, let’s move on to a more complex demo, the Hilbert’s S Axiom. It says, if you have a way to get from P to Q, where Q implies R (if you have Q, then you have R), and you also have a way to get from P to Q, then given P, you can derive R.
1 | (P -> (Q -> R)) -> ((P -> Q) -> (P -> R)) |
A little obscure if you lack basic knowledge of logics. P, Q and R are predicates, so they are either true or false. The logic statement does not have to be a tautology (always true), but it must be true under certain condition. For example, the statement P -> Q is true if “when P is true, Q is also true”. So to prove P -> Q, you just need to prove that when P is true, Q is also ture.
You can also think it in another way. For P -> Q, P is the sufficient condition for Q, and Q is the necessary condition for P. Propositions are true, and we just want to prove their relation.
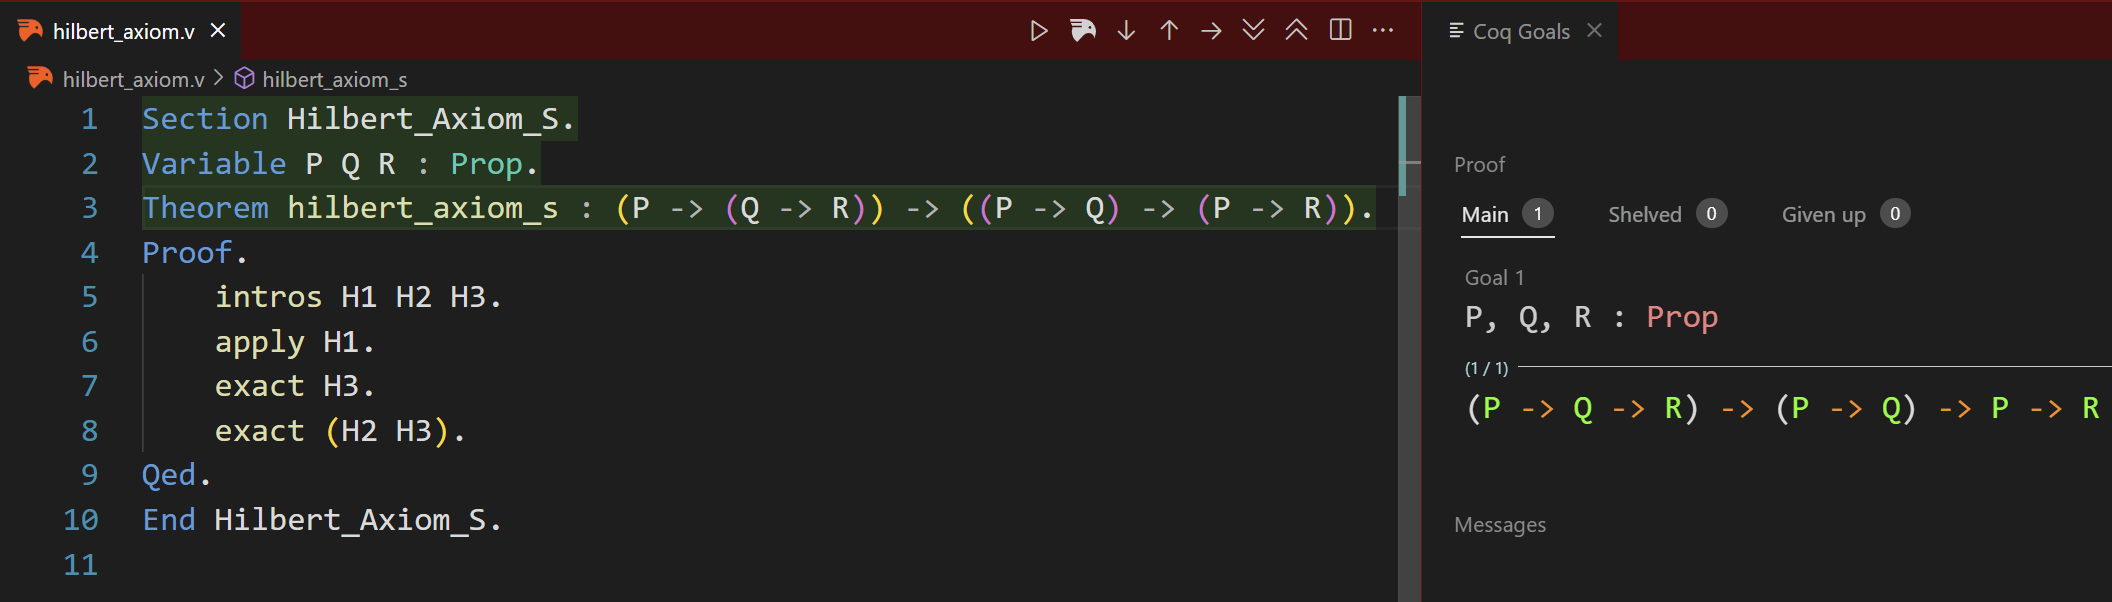
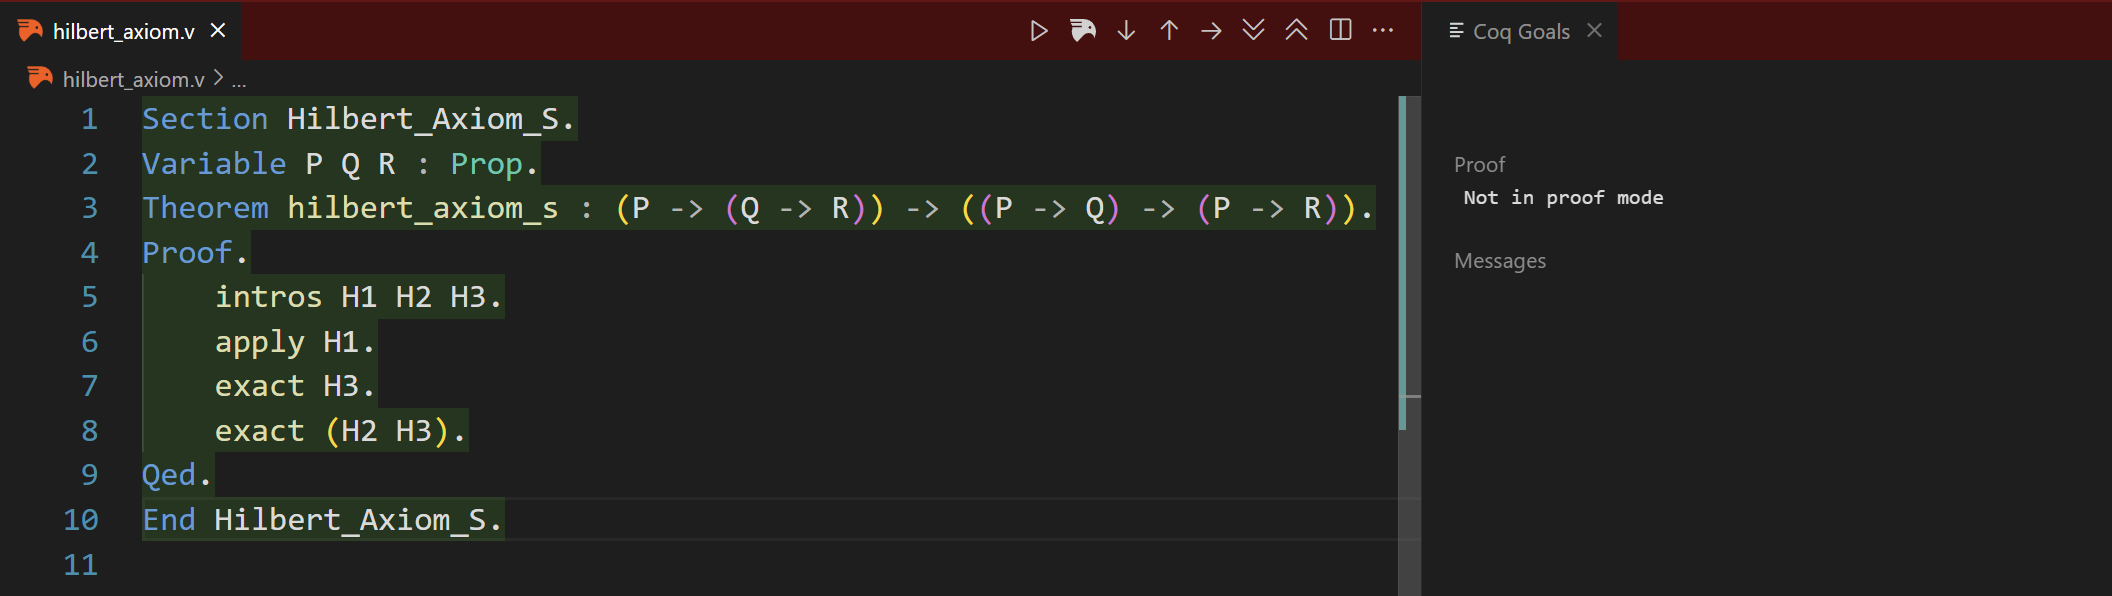
With this basic understanding, let’s move on to Hilbert’s S Axiom. Here is how we write it in Coq. In order to define variables, which are propositions here, we need to scope them in a section. Then, different from Goal, we need to explicitly set the name of Theorem.
1 | Section Hilbert_Axiom_S. |
Then, let’s break it down step by step.
Step 1.
First, we start the section and define our propositions. Since we’re not proving a tautology, we shouldn’t use forall. Here, Coq automatically simplified the statement for us.
Step 2.
Then, we introduce our hypothesis. So our goal is to prove that, when H1, H2 and H3 are true, then R is true. So with these three hypothesis, our goal is to prove that R is true.
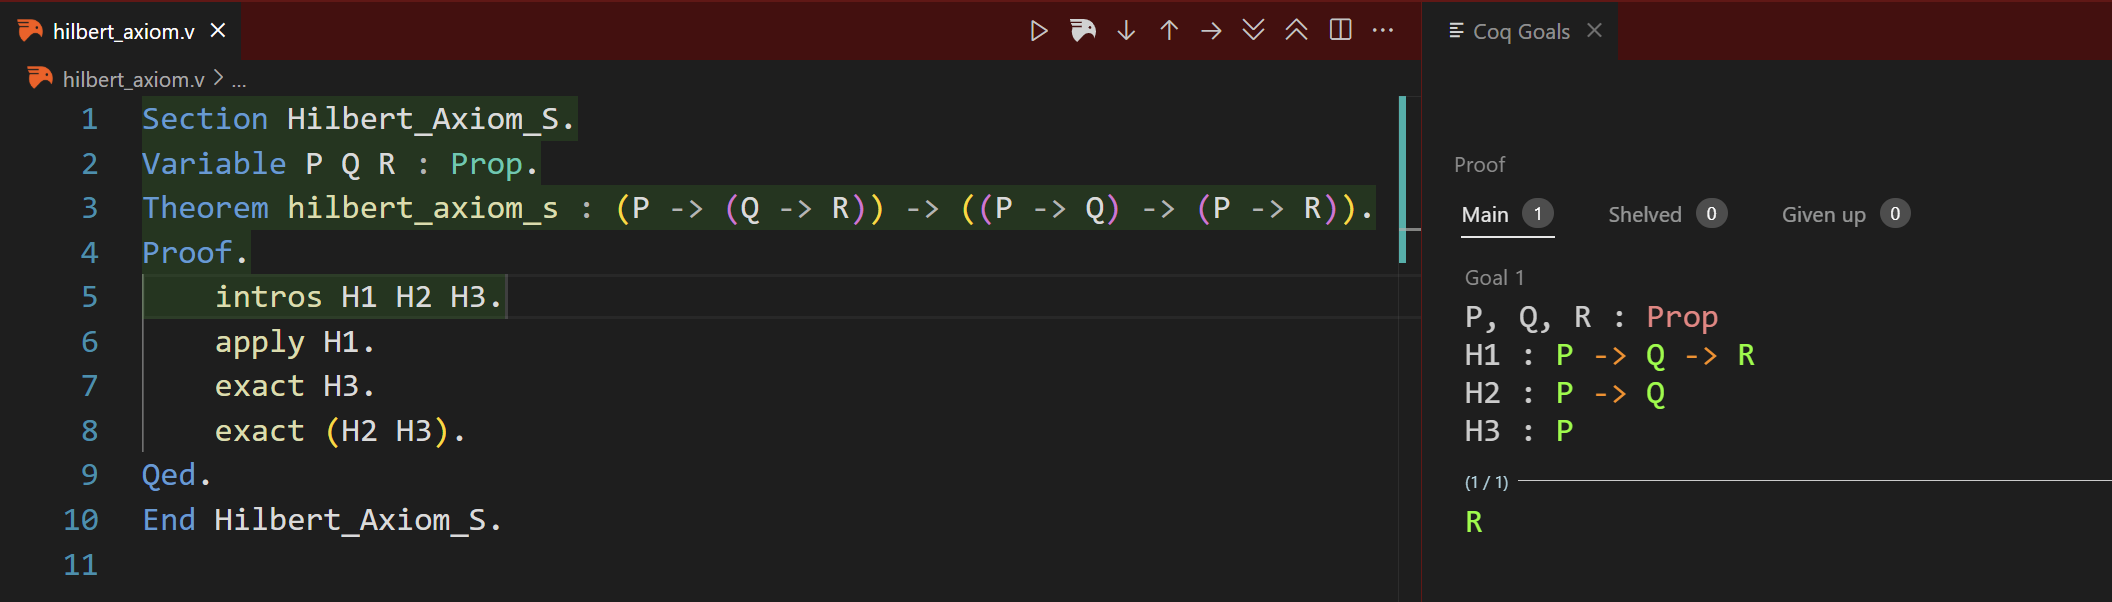
When we make hypothesis, we assume that they are true, and have to prove those which is not a single proposition.
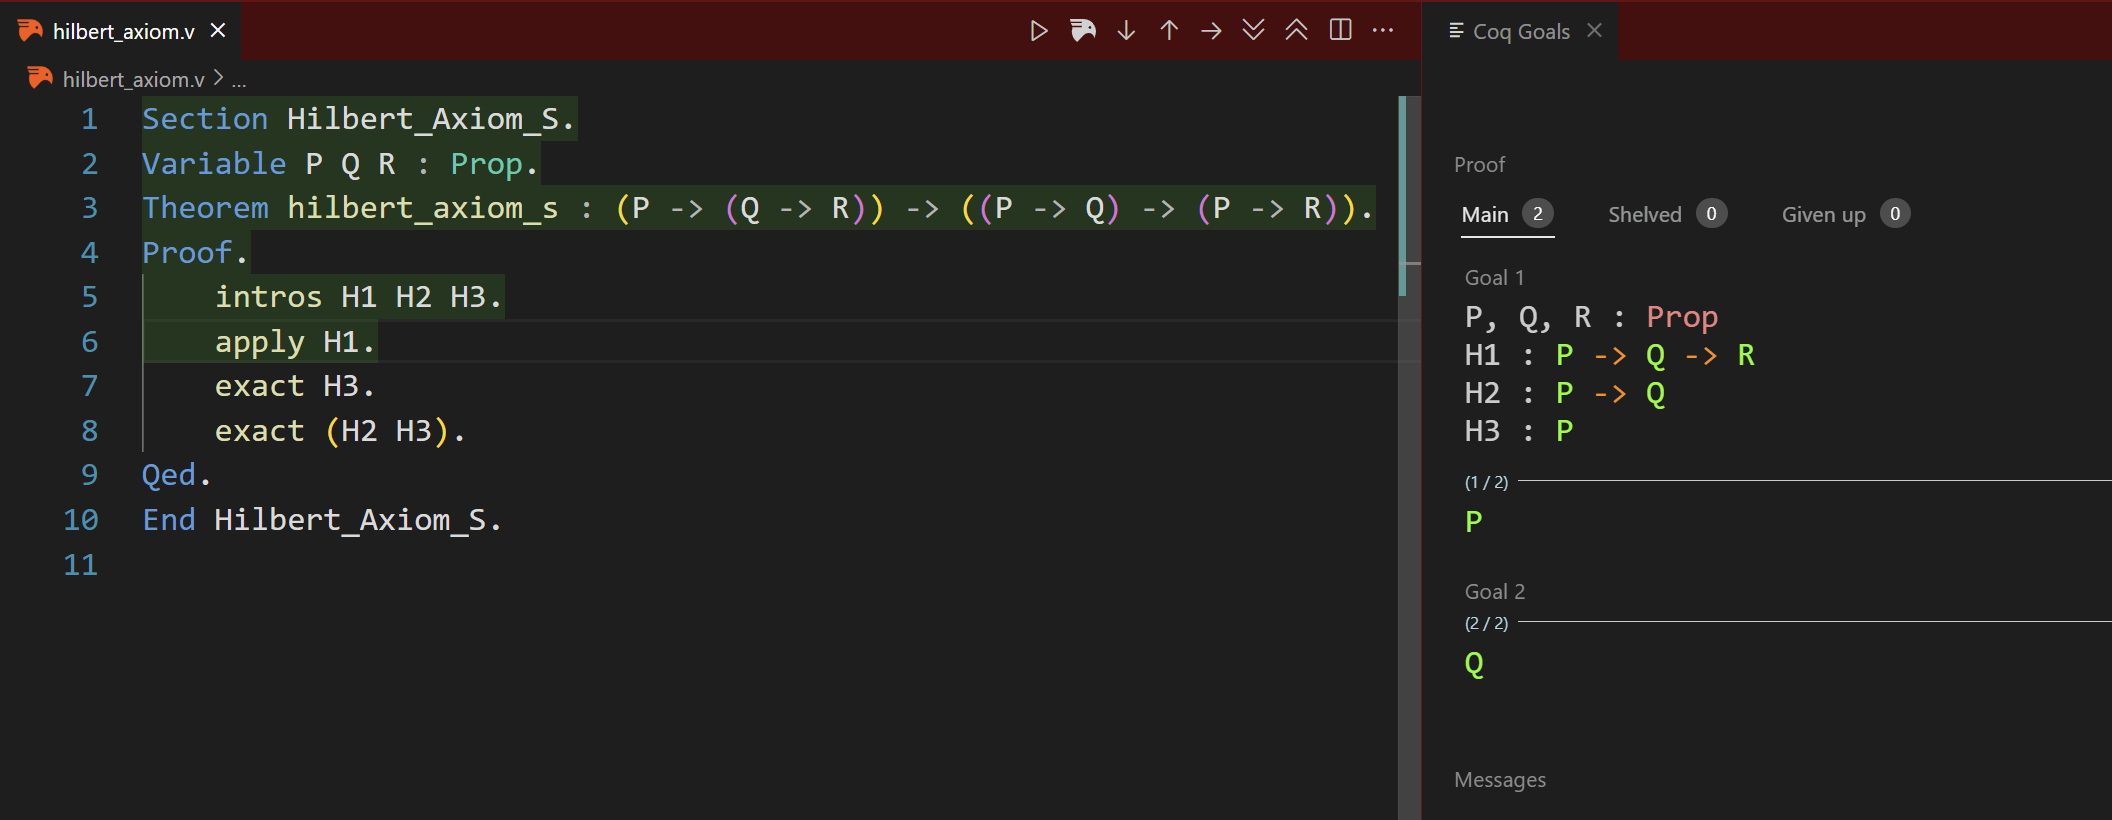
Step 3.
Following, we can use the first hypothesis H1 using apply. By apply H1, we assume that H1 is true, which means when we have P and Q, we can have R. But, we have to prove it then. Since our current goal is R, which is to be true, so our new goal changes to prove both P and Q.
Step 4.
Now, we find that hypothesis H3 matches our first goal, so we can use exact to prove it directly.
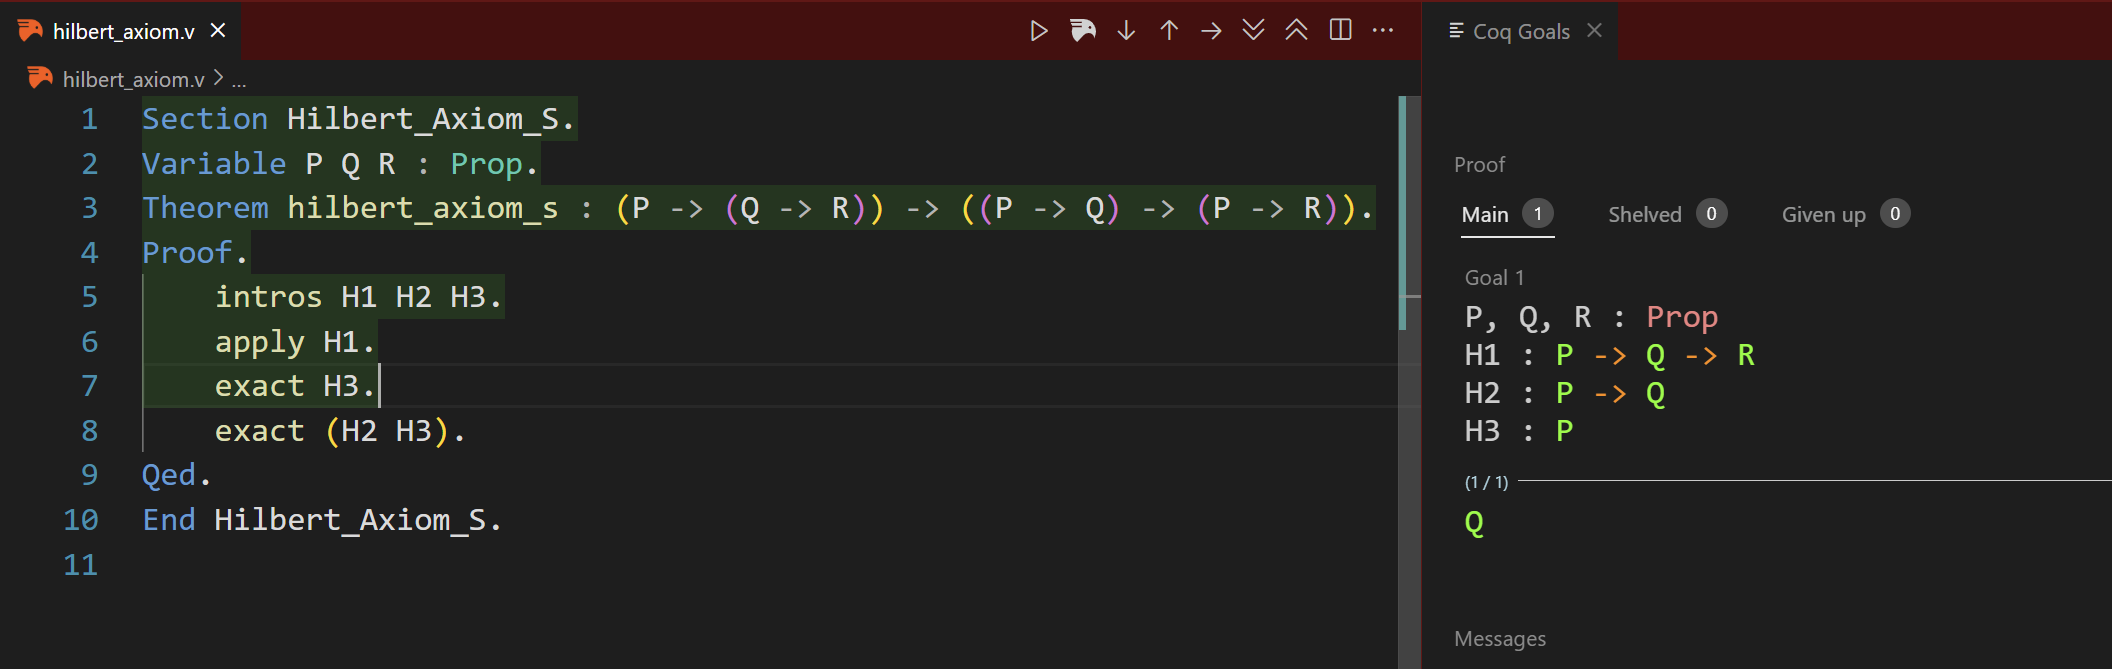
As I mentioned before, when we make hypothesis, they are true.
Step 5.
Then, a little tricky, we can prove Q by providing both H2 and H3. It means when we have H3, then H2 can derive Q.
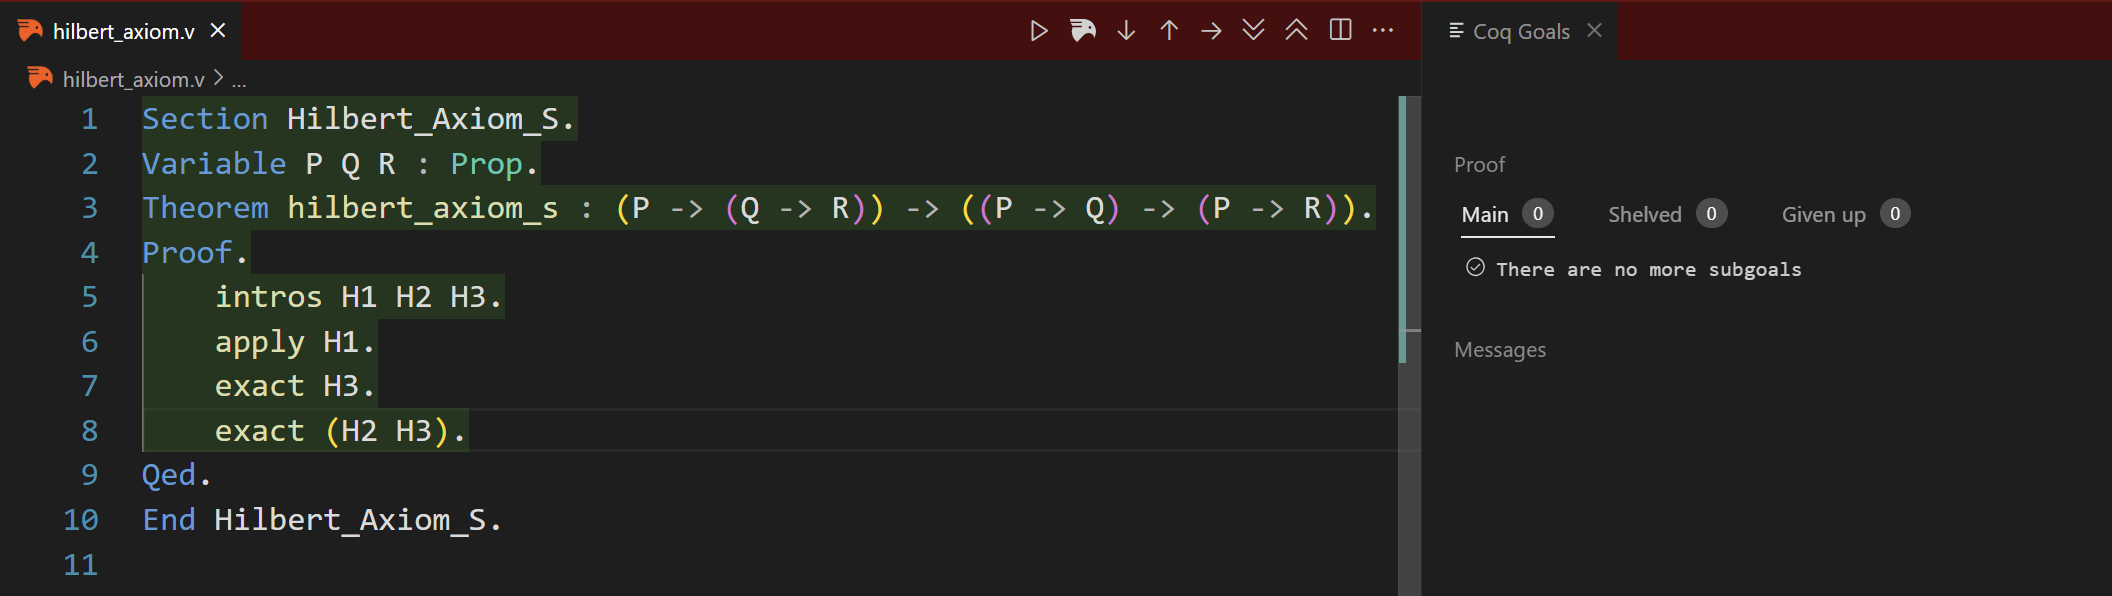
Do note the order of H2 and H3 here.
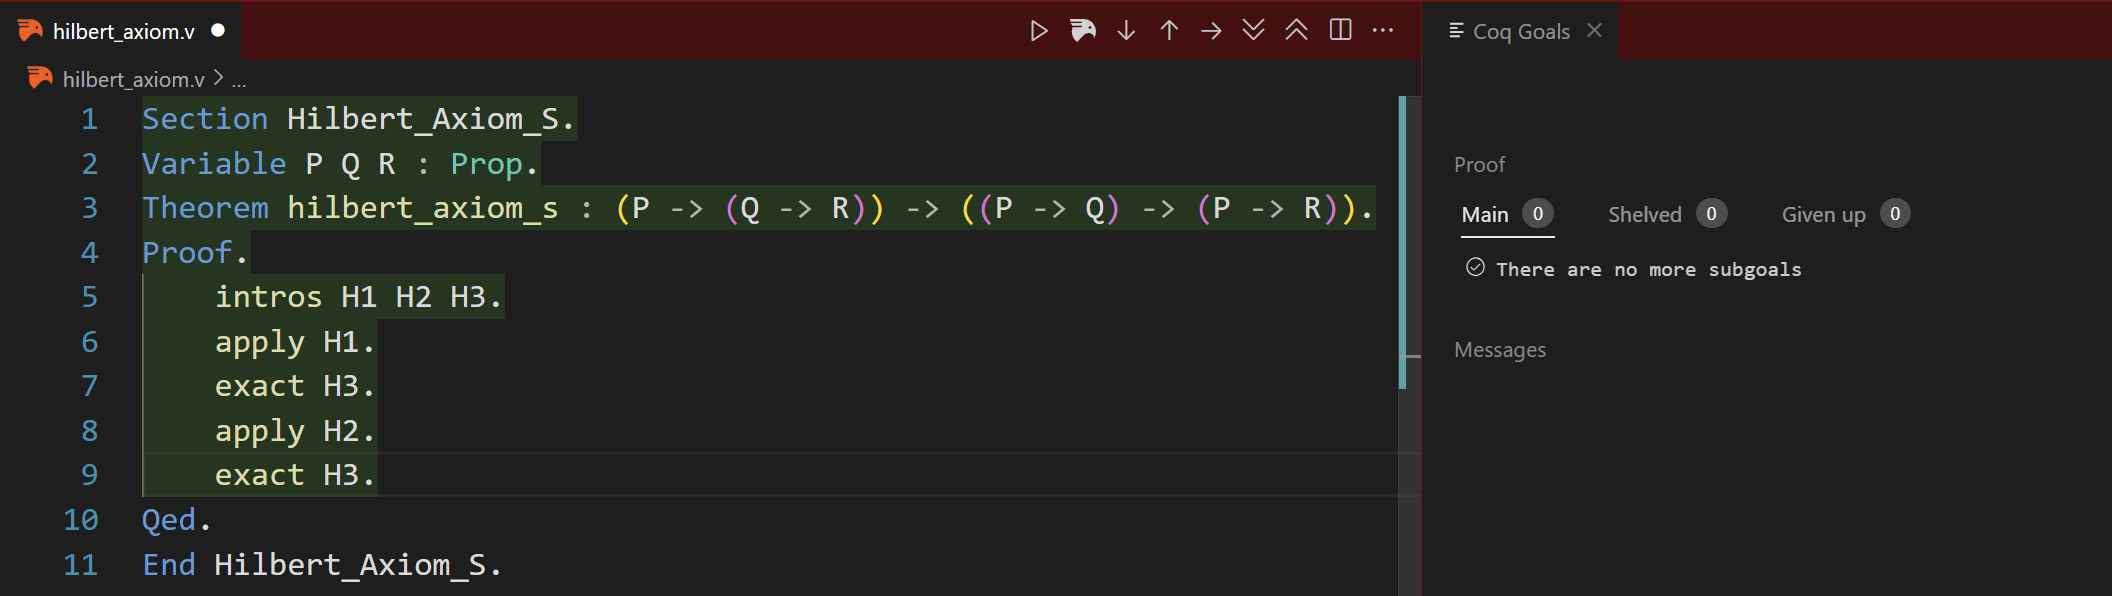
Step 5 Alt.
Actually, we can also prove it using the same tactic in Step 3 by applying H2 first.
Step 6.
Finally, we can conclude our proof.
One example can be enlightening, which is given by GPT. If we have:
P: “It’s raining”Q: “The ground gets wet”R: “Traffic will be slow”
Because we want to get R, so the Hilbert’s S Axiom has:
- If it’s raining, then (if the ground gets wet, traffic will be slow)
- If it’s raining, then the ground gets wet
So if we have “It is raining”, we can get “Traffic will be slow”.
Epilogue
Quite interesting, we can actually prove things in a programming way. However, I’m not good at logic, so if there is any mistakes or unclear statements, leave a comment below. ᓚᘏᗢ